Export calendar from Outlook to Excel spreadsheet without Export feature
The
first method will introduce an easy to quickly export all calendar
items from Outlook to Excel spreadsheet without the Import and Export
feature. Please do as follows:
1. Shift the Calendar folder, and select the calendar which you will export to Excel.
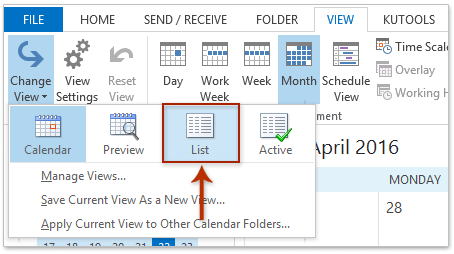
2. Change the calendar view with clicking View > Change View > List. See screenshot:
3. Select all calendar items or multiple ones you will export to Excel.
Note: Holding the Ctrl key, you can select multiple nonadjacent items with clicking each item one by one; holding the Shift key, you can select multiple adjacent items with clicking the first one and the last one.
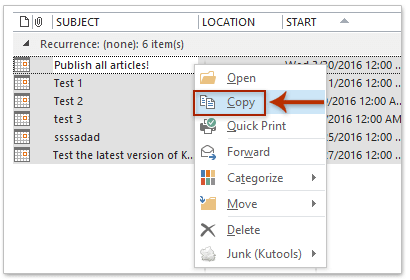
4. Right click the selected items, and select the Copy from the right-clicking menu.
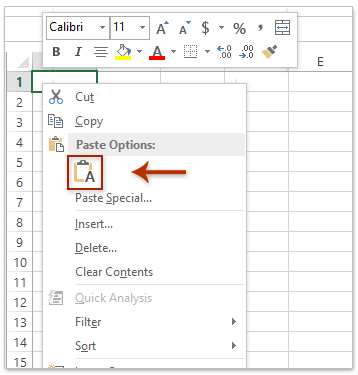
5. Create a new workbook, right click a blank cell and select the Keep Text Only (T) button in the right-clicking menu. See screenshot:
6. Save and close the new workbook.
So for the selected calendar items are exported to a new workbook already.
1. Shift the Calendar folder, and select the calendar which you will export to Excel.
2. Change the calendar view with clicking View > Change View > List. See screenshot:
3. Select all calendar items or multiple ones you will export to Excel.
Note: Holding the Ctrl key, you can select multiple nonadjacent items with clicking each item one by one; holding the Shift key, you can select multiple adjacent items with clicking the first one and the last one.
4. Right click the selected items, and select the Copy from the right-clicking menu.
5. Create a new workbook, right click a blank cell and select the Keep Text Only (T) button in the right-clicking menu. See screenshot:
6. Save and close the new workbook.
So for the selected calendar items are exported to a new workbook already.
 Export calendar from Outlook to Excel spreadsheet
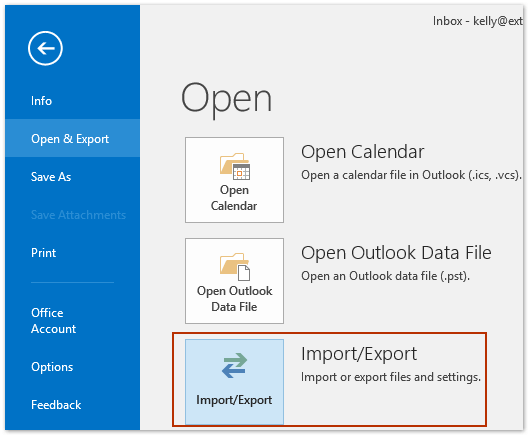
1. Go to File > Open & Export > Import/Export. See screenshot:
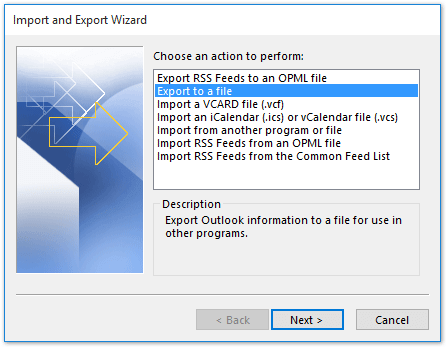
2. In the opening Import and Export Wizard, Under Choose an action to perform, select Export to a file, and then click Next to continue.
3. In Export to a File dialog, please select Comma Separated Values, and then click Next. See screenshot:
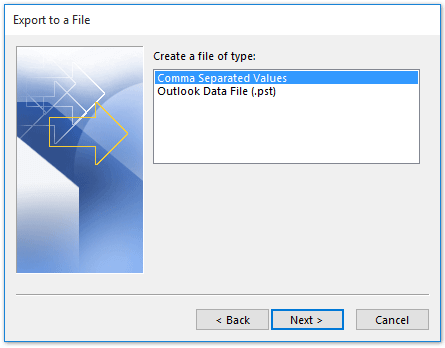
Note: If you are using Outlook 2010 or earlier versions, please select the Microsoft Excel 97-2003 option directly.
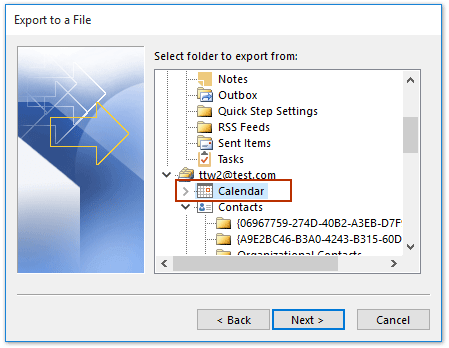
4. Now, under Select folder to export from, select Calendar from Outlook Data File, and then click Next.
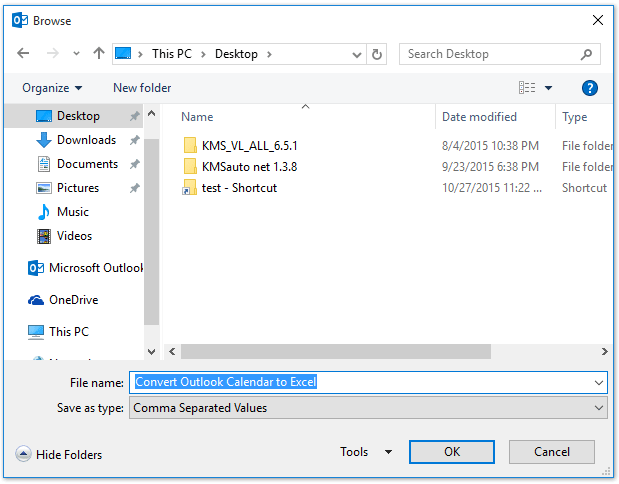
5. When the Export to a File dialog showing up, click Browse… button to select the destination of the file.
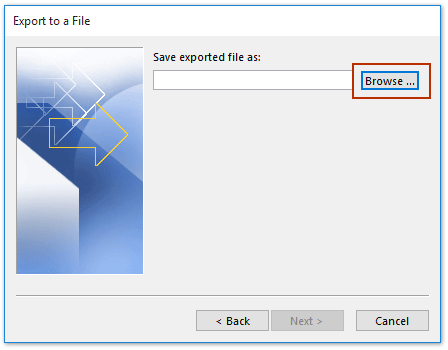
6. Browse and choose the destination where the file can be saved. Name the file and finally click OK to close the dialog.
7. When it turns to the previous Export to a File dialog, click Next to continue.
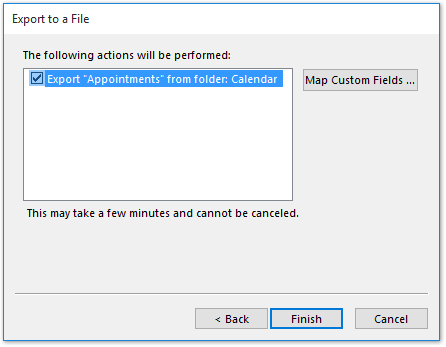
8. Now another Export to a File dialog popping up, click Finish to export your Outlook calendar. See screenshot:
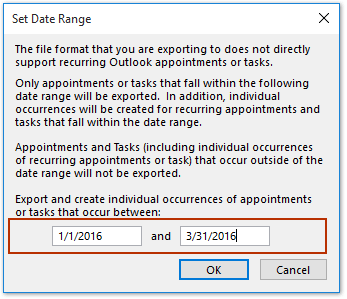
9. In the Set Date Range dialog box, please specify the date range you will export calendar within, and click the OK button.
Note: If you are using Outlook 2010 or earlier versions, and you select the Microsoft Excel 97-2003
option in Step 3, the calendar has been exported as Excel workbook
already. If you are using Outlook 2013 or higher versions, the calendar
has been exported as a CSV file, and please go ahead with below step.
10.
Now we have export the specified calendar as a CSV file. Please open
the CSV file with Microsoft Excel, and then save the file as workbook.

No comments:
Post a Comment