There are two methods for mapping a
shared folder to a network drive (using GUI and group policy). I am
focusing on the later method of using a group policy.
I assume you have already shared a
folder with right permissions. You can check my recent article on setting
correct permissions for a shared folder.
Map
a Shared Folder to Network Drive
Step 1: Open the group policy management console.
Step 2: Right-click on your domain or any specific users OU for
which you want to map the network drive.
Step 3: Click "Create a GPO in this domain, and Link it
here".
Step 4: Give a meaningful name to the GPO.
Step 5: Right-click on the newly created GPO and choose Edit.
Step 6: Go to the following location.
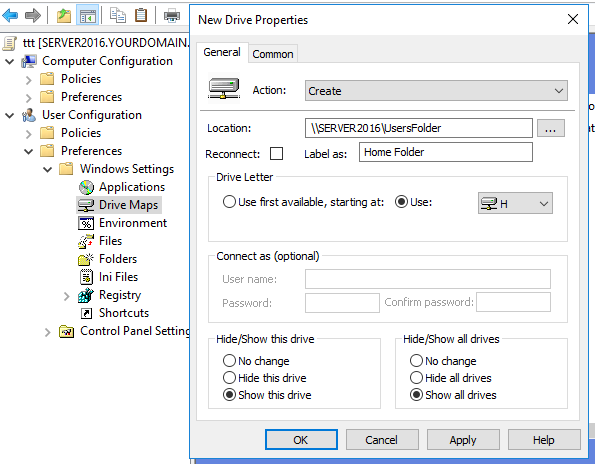
User Configuration -> Preferences
-> Windows Settings -> Drive Maps
Step 7: Right-click on Drive Maps and then click New
-> Mapped Drive.
Step 8: On the General tab, choose 'Create' from the
action drop down.
Step 9: Provide the shared folder location, check the Reconnect
checkbox, and give a meaningful label as well as a drive letter.
Step 10: Go to common tab, and choose Run in logged-on user's
security context option.
Step 11: Open the command prompt and execute
the gpupdate command to update the group policies.

No comments:
Post a Comment